{Making Monday} From Pencil to Brush: Seville Wall Painting Progress

Finally some color! I recently taught someone how to paint with oil paints so I soaked my oil paint tubes in hot water to open them. I suppose 5 years was enough time to seal them shut. When setting up my palette, I was reminded why I hadn't gotten back into oil painting. The set-up alone took at least 30 minutes! Normally my painting sessions with ink and watercolor are about 1 hour total. BUT this is a special project for Page's office and is therefore a good reason to get back into oil painting. His office is currently white, grey, and black. The only pop of color in the room = bright stripes on his socks (that go with his dress shirt, of course).

The pencil drawing was completed many weeks ago. The next part for this project was the color outline. In the end, this green will be mostly covered up and won't be very noticeable but the pops of bright color coming through the rest of the wall painting will keep it looking fresh...which is exactly what a monotone office needs!

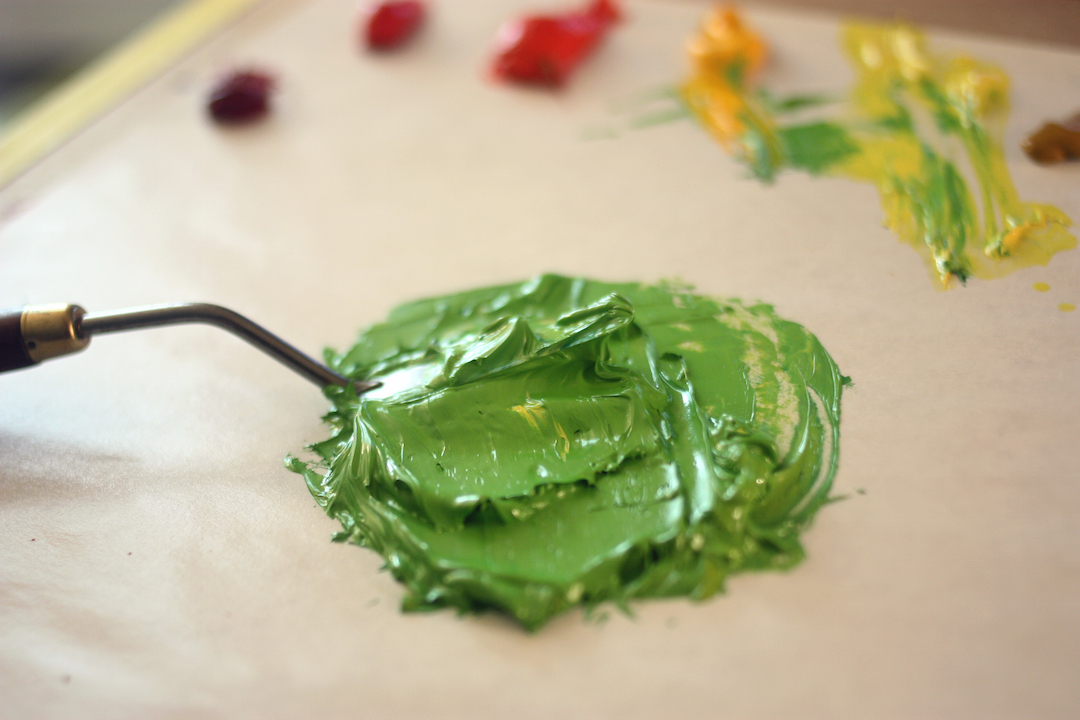
Mixing paint is best with one of these tools: a palette knife. Otherwise the paint gets stuck in the bristles of the brush and ends up riding up the brush handle, so it will waste time and paint.


This green has cadmium red light in it (that's the bright red, third from the end). Mixing opposite colors on the color wheel helps tone down your color, but adding too much makes brown so it's best to add a dab at time.

Mixing paint

Growing glob of green...

Oil Painting Outline


It's always an exciting and sad step to start painting because that means my drawing that I spent hours on will be covered up. It sounds dramatic but there is some kind of attachment especially when the drawing turns out well. Those detailed lines below that describe the old stone wall will covered by thick strokes of paint. But they serve their purpose, because without the detailed drawing there would be no variation of line in the painted thick outline.

Oil Painting

Aaaand here are the paintings below. These 3 will line up side by side. They're quite large though it's hard to tell. They currently take up the length of our kitchen... a very small kitchen, but the entire kitchen nonetheless! It seemed like the safest place to put them while they dry for the next 2 days or so since our meals are ready and I won't be cooking. 

I'm stuck on this one below because I wanted to photograph the paintings before it got dark, but knew I wouldn't have time to complete it since it has the most detail. I may switch brushes to a smaller one to get more detail in for the outline.

The main part I'm stuck on:

I love the casual dress code at work, but it's hard to beat slippers and spandex...and the green streak of paint in my hair. There was a time when I wanted to bleach and color my hair bright purple, but it seems like I get to experiment with all sorts of hair colors (in streaks and highlighted ends) through painting. When washing my hands in the bathroom, I saw  my reflection with a dark red mustache. I didn't even use dark red paint today. Green hair, red mustache, stretchy pants and slippers... It's probably a good thing this oil painting business is only on weekends.

2/50: "Doesn't look like a mental hospital anymore..."

Thursday's project: build a frame to stretch a painting I painted in Italy in 2010. During the semester in Italy, as an attempt to conquer my fear of large paintings and obsession over perfect details I started "going big" with painting.

Thinking back, I'm sure my parents appreciated that I chose to begin to paint huge things overseas, also leaving thick strokes of paint for added texture instead of trying to smooth it over, especially with the heavy, thick materials (canvas + oil)...and then shipped them back home. I suppose they are seasoned parents and have learned to be gracious by kids giving them many opportunities to practice.

Maybe they were glad at least I wasn't inspired to imitate Michelangelo's marble sculptures or fresco paintings (Dear Mama and Papa, Italy is an inspiring place. I saw Michelangelo's Moses today and the Sistine Chapel yesterday! Speaking of Michelangelo, I shipped my lime plaster walls paintings and they should arrive home soon...Miss you! Love, Ema)

Anyways, I got the wood at Home Depot, looking lost in the lumber aisle, wearing my outdoor slippers and leggings, holding each piece of 8ft pine with one end close to my nose, staring it down with one eye closed and turning each side to make sure they weren't crooked. After my attempted careful selection of pine, I hunted down a Home Depot associate to chop the 8ft pieces in half in order to stuff into my Honda Civic.

I learned how to build stretcher frames in college, but that knowledge was useless without a wood shop. My dad recently built an incredibly intricate tea ceremony table, so I thought this would be the best time when his wood-working materials were easier to access than later if he moves on to a different project.

I can't take credit for this frame. I glued, measured, carried, swept sawdust... honestly my three year old niece who has a much better eye for precision would have been a better assistant.

  • Table saw step(s): cut each piece to make the top surface a long diagonal line so the painting rests on one outer edge. Shave off 1/2" width of one extra piece that will be cut in 4 to brace the 4 corners.
  • Chop saw step(s): 45 degree chops to make the pieces fit together.
  • Glue and nail: Apply wood glue. Check diagonal lengths to make sure they're equal. Nail in place.

There are tons of tutorials online and correct me if I'm wrong, but most people reading probably don't have a table saw, chop saw, nail gun, and a compressor handy, or the need to stretch an old painting to begin with.

After 24 hours of letting it rest, I wrestled the painting into place with my staple gun. It's surprisingly difficult to tightly stretch an already stretched LARGE canvas. Just stretching it probably took close to an hour...

Last step! I can't take credit for this either actually. Once we held the painting up all over the apartment and decided on a spot, since I can't hang anything straight, Page, who is much more precise and handy, completed the project.

Once it was up (& I cleaned my closet avalanche) Page's comment made me laugh: "maybe someone actually lives here, it doesn't look like a mental hospital anymore." After 17 months being married, our bedroom's four white walls finally have some color!

Is it fair to call this post 2/50 for the year since I was like a little elf running around and filling in details but not actually doing most of the hard work? Maybe not...

Now that I'm on a roll of asking for help with projects, if anyone wants to teach me how to properly make a bed, I am all ears.